Nero is a shared Big Data Computing Platform specifically designed for high-risk datasets developed in collaboration with the School of Medicine (SOM) and Stanford Research Computing Center (SRCC). Nero is PHI compliant and operated by the Stanford Research Computing Center.
The Nero Computing environment consists of the Nero Google Cloud Platform. It is a Nero instance deployed in the Google Cloud Platform (GCP). Cloud infrastructure costs are passed through to faculty via PTA# to cover the explicit GCP costs, and within the first year we will define labor recovery costs (☞ learn more).
JupyterLab UI
The Nero platform offers the popular web-based interactive development environment, called ☞ JupyterLab. Usually at the very beginning of your visit, you will see a launcher page. The screenshot below shows the user interface of the Nero launcher page.

Figure 1: The user interface of JupyterLab, which is the home page of Nero
(1) Left sidebar
The left sidebar contains a number of commonly-used tabs, from top to bottom:
- File browser: You will use this tab most of the time.
- Running kernels and terminals: Manage all running kernel and terminal sessions in one place.
- Command palette: Show the list of all available commands.
- Open tabs: Manage all open notebook, console or other document tabs.
(2) File Browser command bar
This command bar is only visible when you select the "File browser" option in the left sidebar. From left to right:
- Open a new launcher page.
- Create a new folder.
- Upload a file from your local computer to Nero.
- Refresh the file list.
(3) Menu bar
The menu bar at the top has top-level menus that expose actions available in JupyterLab with their keyboard shortcuts, from left to right:
- File: actions related to files and directories.
- Edit: actions related to editing documents and other activities.
- View: actions that alter the appearance of JupyterLab.
- Run: actions for running code in notebooks or consoles.
- Kernel: actions for managing kernels.
- Hub: actions for managing the server (e.g., stopping the server, or logging out)
- Tabs: a list of the open notebooks and other documents.
- Settings: common settings and advanced settings editor
- Help: a list of JupyterLab and kernel help links.
(4) Notebook selector
The notebook selector allows you to choose a kernel type for running the notebook (i.e., Python, R, SAS and Stata). The "RStudio" button will open the RStudio web-interface instead of a notebook (☞ see Notebook UI)
(5) Console selector
The console selector allows you to choose a kernel type for running a code console (i.e., Python, R, SAS and Stata) (☞ see Console UI)
(6) Other selector
The other selector allows you to open a "Terminal" for doing some advanced commands in the server (☞ see Terminal UI). Or to open a simple text editor.
To learn more about the interface, please refer to the official documentation ☞https://jupyterlab.readthedocs.io/en/latest/user/interface.html
Notebook UI
If you select one of the kernel type in the "Notebook selector", you will get a notebook page. The screenshot below shows the user interface of the Jupyter Notebook page.
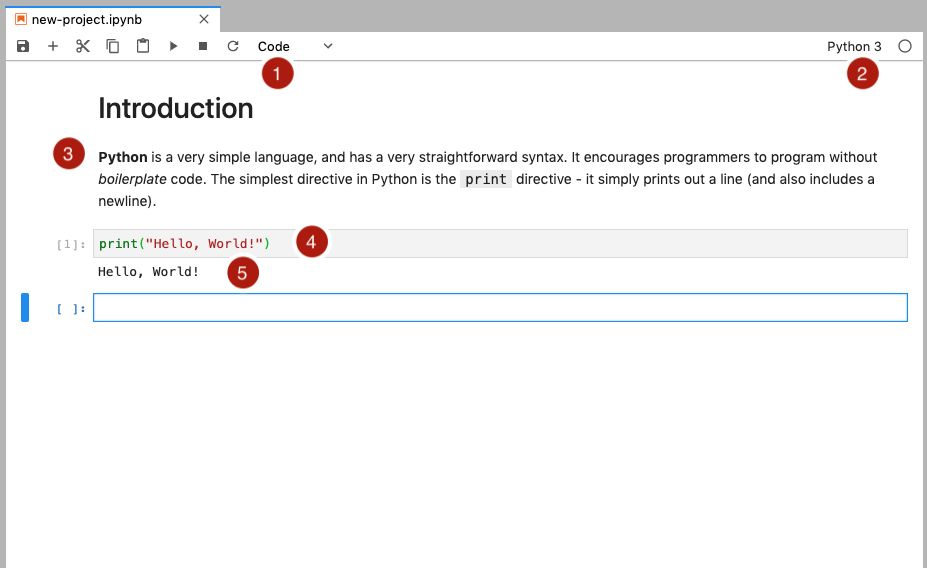
Figure 2: The user interface of Jupyter Notebook
(1) Mode selector
The mode selector allows you to change the interpreter for the code cell. The options are: Code (for programming), Markdown (for documentation) and Raw.
(2) Kernel selector
The kernel selector allows you to change the kernel immediately.
(3) Markdown documentation
The text in the screenshot shows a rendering example given a Markdown-formatted text ( ☞ learn more).
(4) Code cell
The code cell is the place where you type your lines of code or a Markdown text. Press [Shift+Enter] to execute the code or render the Markdown text.
(5) Output space
This output space locates at the bottom of a code cell. If your code produces an output then the result will appear immediately at the bottom of your code.
To learn more about the interface, please refer to the official documentation ☞ https://jupyterlab.readthedocs.io/en/latest/user/notebook.html
Console UI
If you select one of the kernel type in the "Console selector", you will get a console screen. The screenshot below shows the user interface of the Jupyter Console screen.
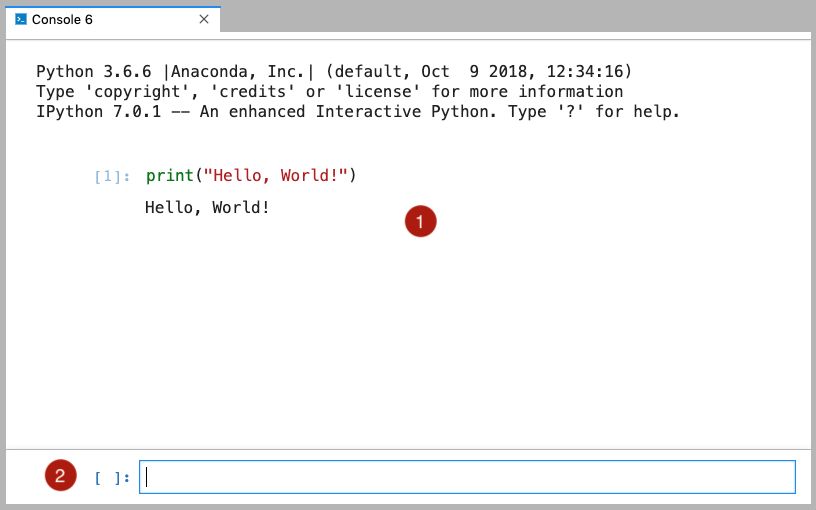
Figure 3: The user interface of the Jupyter Console
(1) Console screen
The console screen will display the code and an output, if any.
(2) Code cell
The code cell is the place where you type your lines of code. Press [Shift+Enter] to execute the code.
To learn more about the interface, please refer to the official documentation ☞ https://jupyterlab.readthedocs.io/en/latest/user/code_console.html
Terminal UI
If you select the Terminal button in the "Other selector", you will get a terminal screen. The screenshot below shows the user interface of the Jupyter Terminal screen, where you can type some UNIX/bash command to operate your virtual server machine.
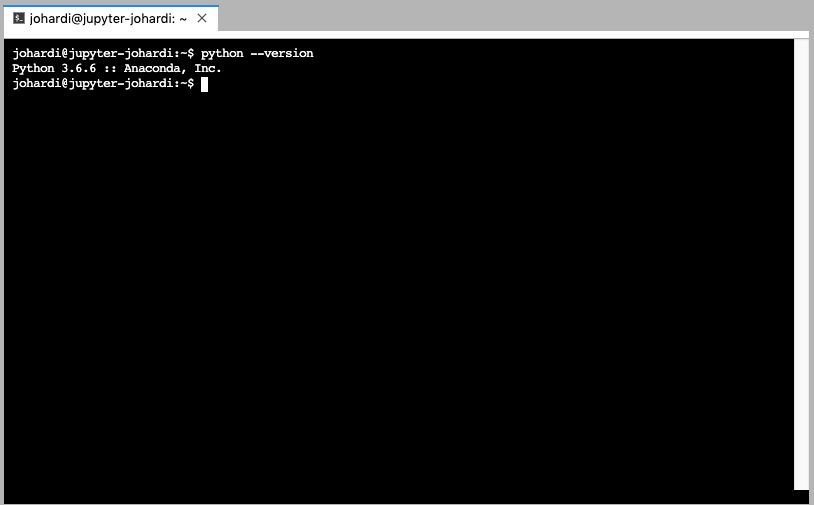
Figure 4: The user interface of the Jupyter Terminal
To learn more about the interface, please refer to the official documentation ☞ https://jupyterlab.readthedocs.io/en/latest/user/terminal.html
Additional Nero Resources
Overview of Nero GCP: https://nero-docs.stanford.edu/gcp-overview.html
Comparison of Nero and Carina: https://carinadocs.stanford.edu/prem-vs-cloud
Nero Account Request Form (Click 'Order Nero GCP' in the bottom left): https://nero-docs.stanford.edu
Introduction to Nero GCP Webinar: Here
Nero Support: https://nero-docs.stanford.edu/help-and-support.html
Nero Office Hours: https://calendly.com/srcc-officehours/nero-officehours
Support Email Address: srcc-support@stanford.edu
Nero Slack Channel: #nero-users